

This is a dependable, old fashioned all butter crust (top and bottom crust) that's full of buttery flavor, flaky layers, and no shrinking!
I love to use my Cream Cheese Pie Crust for single crust pies because it's a nice sturdy pie crust to use for designs or braiding, but I LOVE all butter pie dough for double crusts or lattice crusts.

What "Old Fashioned All Butter" means: a classic pie dough made with only butter (no shortening), and a gentle mixing technique that preserves butter pieces for flaky layers. No food processor, mixer, or special tools needed, just like my old fashioned yeast rolls. You can use hands, a fork, a pastry blender, or my personal favorite, a cheese grater.
It's easy to half the butter pie crust recipe to make a single bottom crust and use it for pies like brown sugar cream cheese pumpkin pie, baked pistachio custard pie, or baked banana cream pie.
Jump to:
Why You'll Love This Recipe
- Taste: Obviously buttery. Flaky, tender!! Ah. Delicious. You can taste the salt which test tasters loved.
- Ease: Making the dough: easy. Making sure everything is the right temp, a little less easy. I grate the butter just like in my caramel apple cinnamon scones recipe, it's easier than a fork for me and makes the crust nice and flaky!
- Time: 5-10 minutes to make, 30 minutes to chill.
📝 Ingredient Notes

- Butter - Usually unsalted butter is used in commercial pastry making because science says it can provide a more consistent base and structure for doughs due to lower moisture content and salt levels than salted butter. I have not noted any texture adverse results when I use salted vs unsalted for most home baking but I HAVE noticed a difference in taste and salted butter wins every time. Ergo, I use salted butter in my pie crust.
- Cold Water - ICE cold to help keep the butter cold. There are SO many recipes that don't call for enough water resulting in crumbly dough, this recipe accounts for that. Usually the colder the ingredients, the drier the dough. It's easier to add more flour to the dough than water if the dough is dry and crumbly when rolling it out.
- Salt & Sugar - salt for flavor ALWAYS, sugar for browning. It actually doesn't affect the flavor too much.
See the recipe card below for full information on ingredients and quantities.
✏️ Substitutions & Variations
- Use a ½ teaspoon of garlic for a savory pie crust!
- My favorite: chocolate pie crust! Replace ¼ cup (about 30g flour) with ⅓ cup cocoa powder (about 29-30g).
🧑🍳 Instructions
You can make this pie dough by hand the good old fashioned way or in a food processor if you wish. Just be careful not to overmix it if you do.

- Step 1. Put butter in the freezer and fill a large measuring cup with about 1 cup of cold water and several ice cubes. Mix dry ingredients: place the flour, salt, and sugar in a bowl.

- Step 2. Remove the butter from the freezer and grate the butter into the flour using a cheese grater. With aggression. Be quick! I usually do one stick into the flour and pop it into the freezer for a minute or two while I grate the other stick onto a plate.
You can also just cut the butter up into cubes to cut into the flour using a fork or fingers.
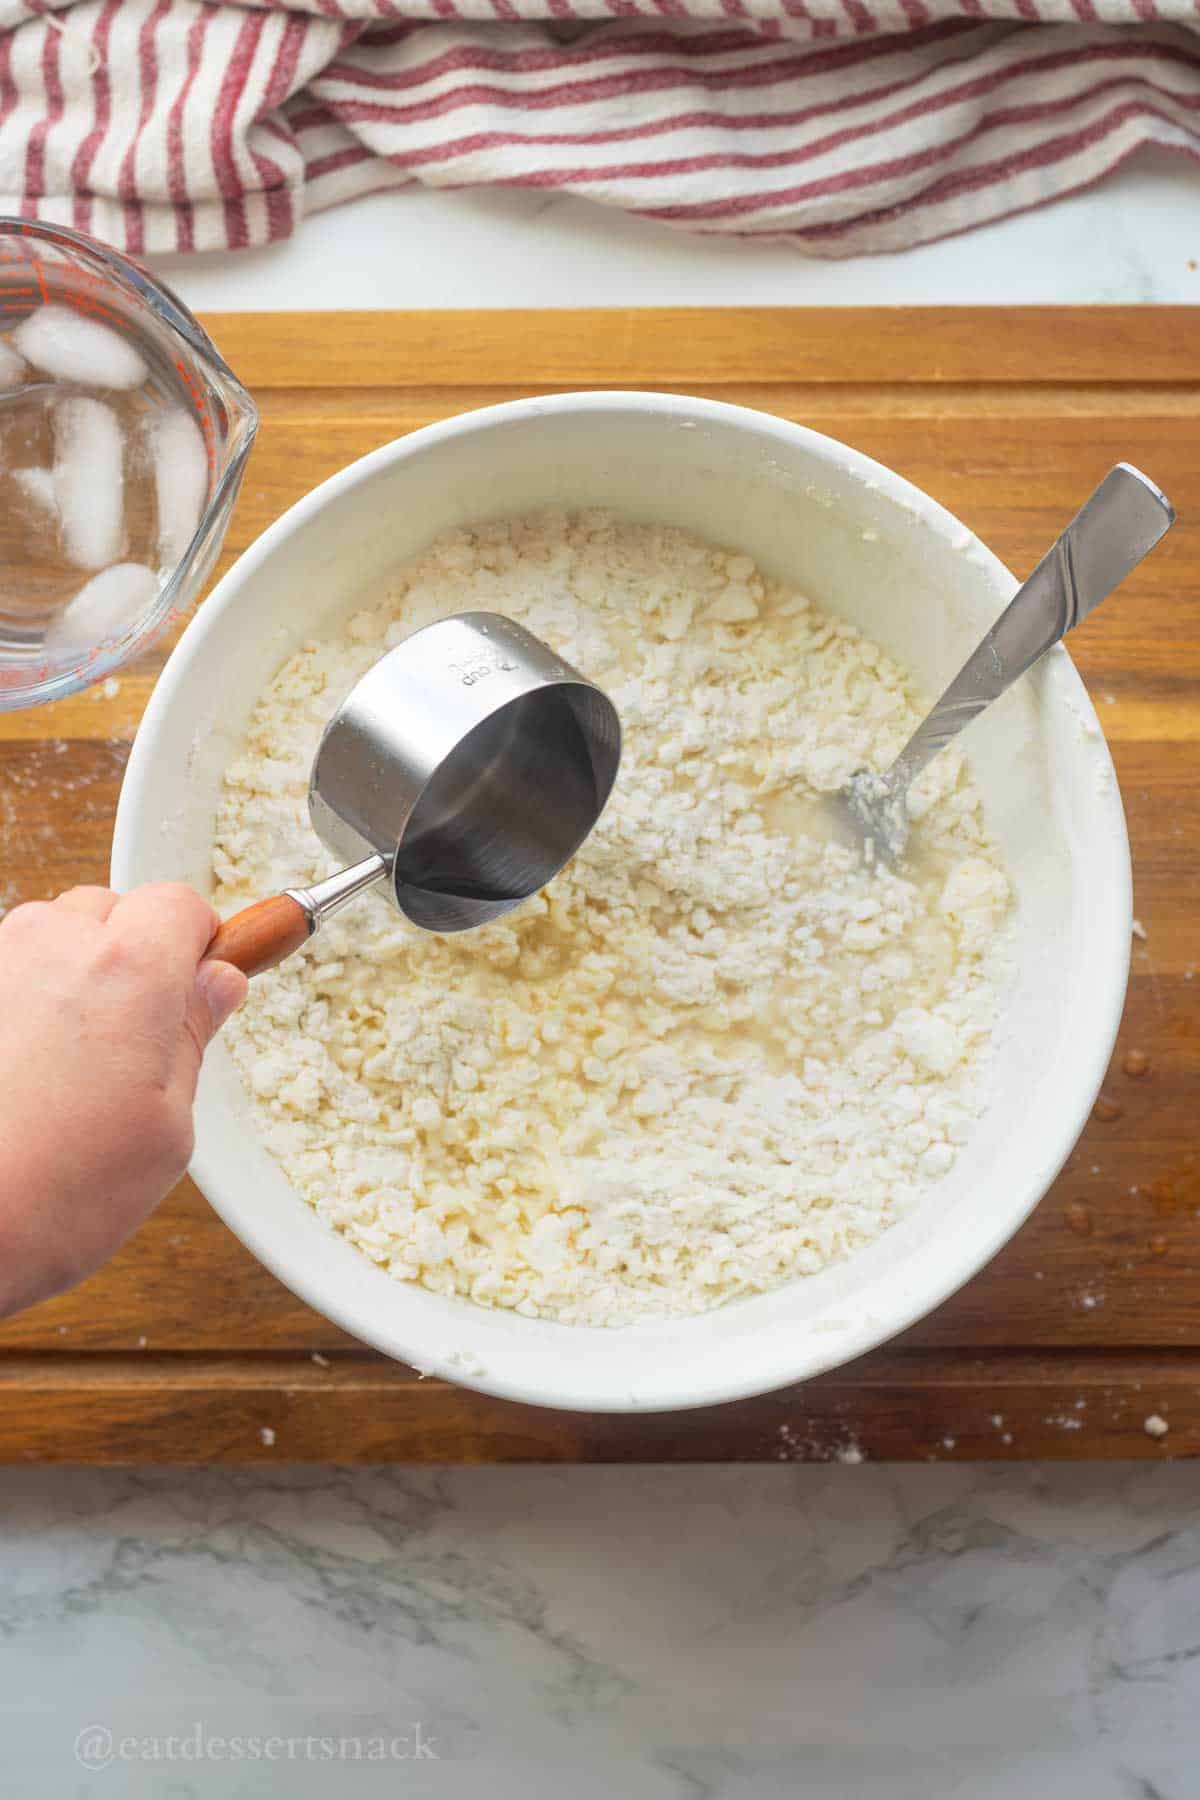
- Step 3. To the dry ingredients, add ice cold water and press the mixture together gently until dough forms. I add the minimum amount of water, then add more water 1 Tablespoon at a time if needed. Mix until the dough JUST comes together. It shouldn't crumble, and shouldn't be super wet or sticky, and won't be all the way smooth since there are butter crumbles.
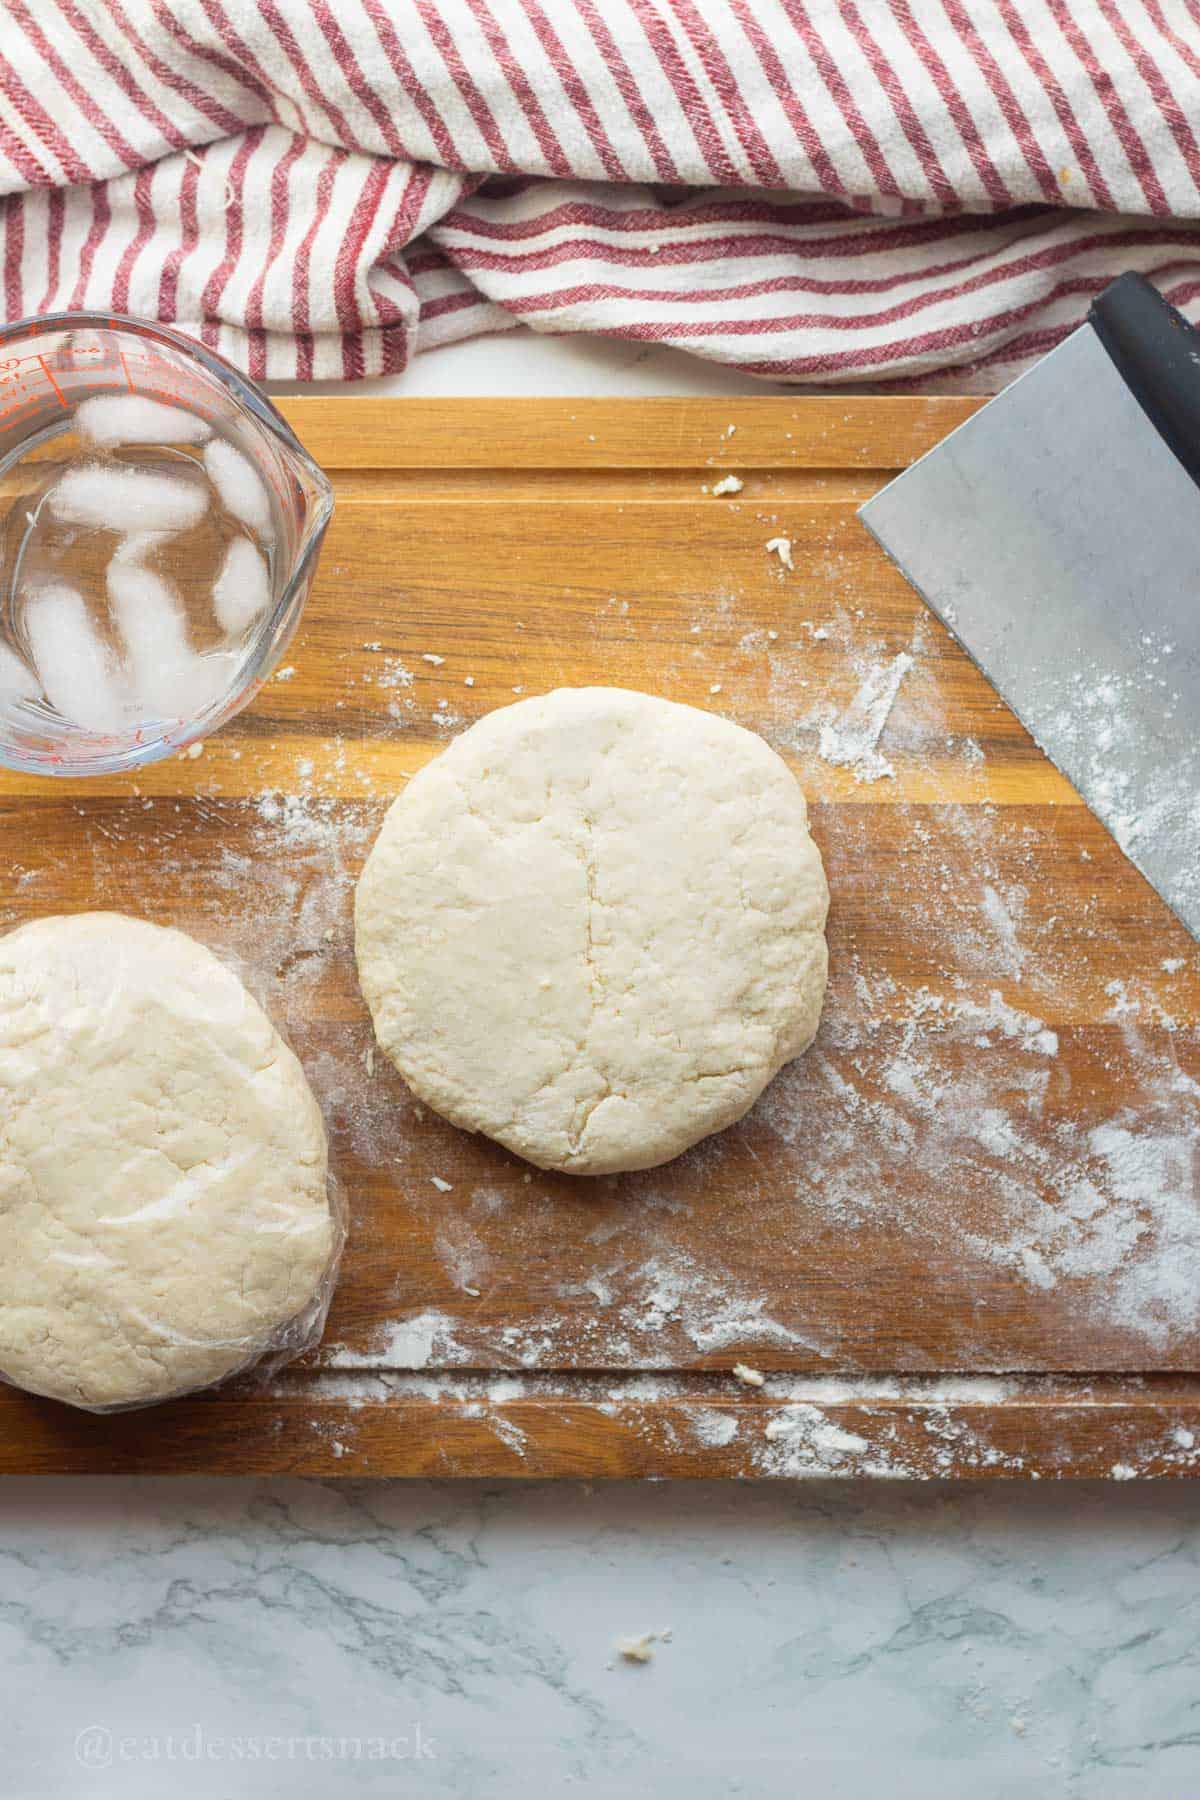
- Step 4. Divide the dough into two portions and shape the dough into discs. Wrap with plastic wrap. Chill in the fridge for AT LEAST 30 minutes, 1 hour if the weather is hot. You can decrease the time to 20 minutes by chilling in the freezer.

- Step 5. After refrigerating your dough is ready to roll out and use! For a single crust pie, trim dough to about ½ inch / 1 cm all the way around the outside edge of the pie plate. Tuck the extra dough underneath itself, and press it gently to make it even with the edge of the pie plate.
- To blind bake the crust (for fillings that don't need baking) fill the pie crust with parchment paper and pie weights or dried beans and bake at 425 ℉ for 18-20 minutes, remove the pie weights and parchment, and bake another 5 minutes or more until the bottom is set and dry. Cool completely before filling.
- To bake with a filling, follow your pie recipe instructions. Uncooked fruit fillings will bake for different times than pre-cooked fruit fillings. For example if I used my homemade apple pie filling with a double or lattice crust, I'd bake at 400℉ for 20 minutes, then lower the oven temperature to 350℉ and bake for another 40-45 minutes.
🌟 Tips for No Fail Butter Pie Crust
- Weigh your flour for more consistent results! I've used this brand of kitchen scale for years and love it.
- Overworking the dough will make the dough tough, so mix it JUST until it forms a dough and there are no dry pockets left then form into discs.
- 30 minutes of rest/chilling time is necessary to prevent the butter from melting and the gluten to relax and to make sure the layers stay flaky!
- You can use a cheese grater to grate the butter into the flour, just do it quickly so it doesn't melt! If I do this I grate it straight into the bowl of dry ingredients and then pop the bowl into the freezer for a few minutes before mixing together to keep the butter cold.
- When rolled out into a pie dish, fold the edges under and into the pan to make a thicker edge to crimp. It makes a difference!
📌 Troubleshooting
- Crumbly dough - not enough water! Make sure to use enough that it's a workable dough before chilling it in the fridge. If it's dry and crumbly before chilling, it'll be worse rolling it out.
- Tough pie crust - prevent this by not overworking the dough and not making it wet and sticky.
❄️ Make Ahead, Store, and Freezing Tips
Refrigerate: up to 3 days, tightly wrapped.
Frozen: up to 3 months in a freezer safe bag or container. Thaw in refrigerator overnight before using. Do not microwave to thaw.

❓Frequently Asked Questions
Warm dough means the butter has melted before the pie is baked, and will melt into a puddle of oil instead of a flaky crust. The colder the dough, the flakier the pie crust!
For beginners, a glass one is best. You can see when it's browned/cooked, and it conducts heat more evenly than metal and more quickly than ceramic or stoneware.
Make sure you chill/rest the dough for at least 30 minutes before using!
Homemade Pie filling Recipes


Did You Try This Recipe? ⭐️⭐️⭐️⭐️⭐️ Make sure to leave a star rating and a comment below the recipe card. I love hearing from you, and it is so helpful to other readers! Better yet, share it with family and friends. Thank you!!
📝 Printable Recipe

Old Fashioned Pie Crust (all butter)
Equipment
Ingredients
- 2½ cups all purpose flour 338g
- ½ teaspoon salt 3g
- 1 teaspoon granulated sugar 4g
- 1 cup cold salted butter 226 g
- ¾ cup ice water 177 mL, more as needed
Instructions
- Put butter in the freezer and fill a large measuring cup with about 1 cup of cold water and several ice cubes. Mix dry ingredients: place 2½ cups all purpose flour, ½ teaspoon salt, and 1 teaspoon granulated sugar in a bowl.
- Remove the butter from the freezer and grate 1 cup cold salted butter into the flour using a cheese grater. With aggression. Be quick! See note 1. Alternate method: cut the butter up into cubes to cut into the flour using a fork or fingers.
- To the dry ingredients, add ¾ cup ice water and press the mixture together gently until dough forms. Add the minimum amount of water, then add more water 1 Tablespoon at a time if needed to the dry crumbs at the bottom of the bowl. Mix until the dough JUST comes together. It shouldn't crumble, and shouldn't be super wet or sticky, and won't be all the way smooth since there are butter crumbles.
- Divide the dough into two portions and shape the dough into discs. Wrap with plastic wrap and chill in the fridge for AT LEAST 30 minutes. See note 2.
- After refrigerating your dough is ready to roll out and use! For a single crust pie, trim dough to about ½ inch / 1 cm all the way around the outside edge of the pie plate. Tuck the extra dough underneath itself, and press it gently to make it even with the edge of the pie plate.
- To blind bake the crust (for fillings that don't need baking) fill the pie crust with parchment paper and pie weights or dried beans and bake at 425 ℉ for 18-20 minutes, remove the pie weights and parchment, and bake another 5 minutes or more until the bottom is set and dry. Cool completely before filling. To bake with a filling, follow your pie recipe instructions. Uncooked fruit fillings will bake for different times than pre-cooked fruit fillings. For example if I used my homemade apple pie filling with a double or lattice crust, I'd bake at 400℉ for 20 minutes, then lower the oven temperature to 350℉ and bake for another 40-45 minutes.
Notes
- Crumbly dough - not enough water! Make sure to use enough that it's a workable dough before chilling it in the fridge. If it's dry and crumbly before chilling, it'll be worse rolling it out.
- Tough pie crust - prevent this by not overworking the dough and not making it wet and sticky.
Nutrition

Hi, I'm Sara!
Registered Nurse by day, food blogger by weekend. Perfect dip tester & snack quester. I love short walks on the beach and long naps. Sharing my love for food, one bite at a time.


Sara says
Super flaky with flavor! You can actually taste the salt which I love.