

This is a soft and buttery old-fashioned yeast dinner rolls recipe with sweet honey, butter, and they are SO FLUFFY.
Just like the perfect Soft Fluffy French Bread, I have the perfect, softest fluffy rolls recipe. This easy yeast roll recipe makes at least 24-30 big soft fluffy dinner rolls. You could make 36 on the small/medium side. This is a large batch dinner roll recipe, but you can easily half it to make 12-15 rolls. It's the PERFECT Thanksgiving rolls recipe because it makes a lot, and it goes so quickly once you learn how to roll them out bakery style!

It's been a decade of developing and tweaking this, THE BEST yeast rolls recipe, until we got it JUST right. It is tried and true, and I haven't changed a thing for years. There's no shortening, processed sugar, or oil in the recipe. Just good old-fashioned honey, yeast, and butter! They taste just like ya grandmas dinner rolls. Absolutely heavenly with a little bit of Honey Butter Spread.
Something I love about this soft bread rolls recipe is that you can make the rolls overnight, or freeze them super easy. You can either freeze them once the rolls are cooled, or the raw dough. The instructions for thawing and baking the raw dough balls are similar to store bought frozen rolls.
Jump to:
What To Expect
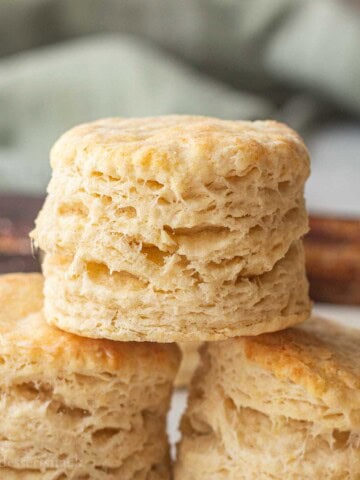
- Taste: These are big fat dinner rolls that are soft, fluffy, and perfectly baked. There's just enough salt and butter to make them delicious!
- Ease: This is a pretty easy dinner rolls recipe. It is straightforward and there is only 7 ingredients. It just takes some time and practice to make the rolls round and evenly sized!
- Time: Usually it takes about 3 hours to make the rolls. 10 minutes to mix, 1 hour to rise, 15-20 minutes to cut and roll, 1 hour for second rise, and 15 minutes to bake. The rise times may vary depending on how warm the room is, but it's easy to speed up the rise time!
🛒 Key Ingredients

- Flour - all-purpose is what I've consistently used over the years and works best for me.
- Honey - no processed sugars here! I have used regular white sugar in years past (it was fine) but I switched to honey because it makes better dough. Better tasting, better to work with.
- Yeast - active dry yeast or instant yeast work great for this recipe. The only difference is the active dry yeast needs warm water, sweetener, and a few minutes to activate before putting it into the recipe. Instant yeast can be added right into the bowl without activating it first.
- Water - it makes the magic happen with these rolls. Milk adds a little too much fat to the dough, making the rolls less fluffy when rising.
- Butter - some fat is necessary for the rolls to be not just fluffy, but fluffy for days! These rolls last for 3-4 days and are still fluffy.
- Eggs - act as a binder but also help enrich the dough so the rolls stay fresh longer.
- Salt - the MOST important flavor enhancer! Bread without salt is not good.
✏️ Substitutions & Variations
- Honey - to make the rolls safe for babies under 1 year old, honey can be substituted with the same amount of agave nectar, pure maple syrup, white, brown, or coconut sugar. The dry ingredients don't affect the dough very much.
- Butter - for a dairy friendly option, switch out the butter with shortening.
- Water - can be swapped out for fat free skim or 1% milk, or your favorite plant-based milk.
- Flour - Bread flour or whole wheat flour may be used, but since they can absorb more liquid I would decrease the amount by ½ cup ( approx. 70g) and add more flour if needed.
🧑🍳 Instructions

- Step 1. In a glass measuring cup or small bowl, combine the warm water (100-110℉), honey, and active dry yeast. Water temperature is important. Too hot and the yeast will die, too cold and it takes much longer to activate. Yeast begins to die at around 120℉.

- Step 2. In a large mixing bowl, combine softened butter, eggs, salt, and flour. I like to place my bowl on a scale, zero it out, and then add the flour to make sure I have the correct weight.

- Step 3. Pour in yeast and flour mixture. Knead for 7-10 minutes by hand (or 5-7 minutes in an electric mixer) until dough is elastic and smooth. Transfer dough to an oiled bowl and cover. Let rise for 1 hour or until almost doubled in size.

- Step 4. Divide the dough into 30 even balls (golf ball sized), usually 58-60 grams each. I like to weigh the dough and divide it by 30 to calculate how much each ball of dough should weigh. I cut about half of the rolls, roll them into the pan, and then cut and roll the other half.
If making 24 rolls = about 72-73 grams each. For 36 rolls, about 49- 50 grams each.

- Step 5. Roll each dough ball into a smooth ball by cupping the hand in a "C" shape over the roll and moving it around in a small circle on a flat work surface. Pressing your hand into the roll and putting pressure on it will help to keep the top in place while the circular motion drags the edges under, stretching the dough to make it smooth and even on top. Practice doing it with both hands! (Video below Step 6)

- Step 6. Transfer each ball into a greased 11 x 18 inch baking pan with rims, about 6 rows of 5 rolls. Spray with baking spray (so they don't dry out) and cover to rise for 1 hour until doubled in size (gaps should be filled in), then check them. They may need a little longer if it's cooler. Make sure to set a timer so they don't rise too much! Overproofing can make them collapse a little in the oven and they won't be as fluffy.
Tip: Set the timer for 45 minutes while the rolls are rising so you can turn the oven on to 375 degrees to preheat for the last 15-20 minutes of the rising time.

- Step 7. Bake the rolls at 375℉ for 15-16 minutes on the bottom shelf. This well help make sure the bottoms are nice and browned.

- Step 8. After removing the rolls from the oven, melt 2-3 Tablespoons of butter and brush the tops of the rolls while they're still hot. I've also rubbed the butter stick straight onto the hot rolls, use whichever method you like!
⏲️ Make Ahead/Overnight Instructions
- Make the dough.
- Do the first rise.
- Shape the rolls and lightly spray them with baking spray to prevent them from drying out.
- Cover with plastic wrap and refrigerate the dough balls before they rise again. I usually do this in two 9x13 pans or one large 11x18 inch pan if I have enough fridge space.
- The next day, give them 1-3 hours out of the fridge (still covered) to rise depending on how cold it is in the room, make sure they are doubled in size or they'll be dense and stodgy when baked.
- Bake away!
📌 Top Tips & Hacks
- Weigh your flour! You will consistently get good results when you weigh your ingredients. Things like butter and eggs are roughly the same amounts, but flour can be tricky to get right without a scale. This is my favorite kitchen scale that I've used for years.
- If you're not sure your scale is weighing right, you can test the scale for accuracy with a stick of butter that has a set weight. Zero out the scale, set the butter on it, and make sure it's 113 g.
- Watch my video in the recipe notes to learn how to roll out dinner rolls bakery style! You can learn one-handed, but it's better to practice with both hands to roll out the rolls quickly and efficiently.
- Practice practice practice. I worked at a bakery in college and learned how to roll out hundreds of rolls quickly. Keep at it! It's all muscle memory, and it goes so quickly once you get the hang of it!
- Butter on the rolls! You can either rub the butter stick straight onto the dinner rolls or melt 2-3 Tablespoons and brush the butter on with a pastry brush. It is the perfect shiny touch and helps to soften up the tops a little right before serving.

❓Frequently Asked Questions
Usually the answer is yeast. If the water was too hot, it could kill it. If the rolls don't rise long enough (not doubled in size, they will be dense and doughy when baked. If they rose too much, they collapse in the oven and aren't as fluffy.
We say "room temperature", which means about 70℉-77℉ (21-25℃). Any colder an they take longer to rise, any higher and they may rise too quickly or kill the yeast.
Yes! Freeze up to 3 months baked or raw.
Follow recipe until Step 6: make dough, let rise ONCE, roll into balls, and freeze dough balls individually.
Bake from frozen: Place dough balls onto a greased baking sheet, cover, and let thaw and rise for 4-5 hours. Placing in a warm area (oven preheated for 2 minutes) will speed up the thawing and rise time. Bake as directed in recipe, but be sure to remove rolls before preheating oven all the way if rising in the oven.
Ingredients and technique. The fat from the butter and eggs enrich the roll dough, helping them to stay soft and fresh for days after baking, along with kneading the dough for the correct amount of time, and making sure they rise TWICE. Buttering the tops after they bake help too!
Store in an airtight container, away from heat. If they've already started to dry out, place a few slices of soft fresh bread in the container and leave overnight to soften them up a bit.
Room Temperature: 3 days
Frozen (after baking): 3 months.
Microwave for 5-10 seconds or warm in the oven (6 or more) covered in foil for 10 minutes at 350℉.
🥖 More Delicious Bread Recipes


Did You Try This Recipe? ⭐️⭐️⭐️⭐️⭐️ Make sure to leave a star rating and a comment below the recipe card. I love hearing from you, and it is so helpful to other readers! Better yet, share it with family and friends. Thank you!!
📝 Printable Recipe

Old Fashioned Yeast Rolls
Ingredients
- 2 cups warm water (100-110℉) 475 mL
- ¼ cup honey 85 g
- 4 teaspoons active dry yeast 14 g
- ½ cup salted butter, softened 113 g
- 2 eggs
- 2½ teaspoons salt
- 7 cups all purpose flour 1000 g
- 3-4 Tablespoons melted butter for tops of rolls
Instructions
- In a bowl, stir together the warm water (100-110℉), honey, and active dry yeast. Water temperature is important. Let rest 5 minutes until yeast becomes foamy on top.2 cups warm water (100-110℉), ¼ cup honey, 4 teaspoons active dry yeast
- In a large mixing bowl, combine softened butter, eggs, salt, and flour. I like to place my bowl on a scale, zero it out, and then add the flour to make sure I have the correct weight.½ cup salted butter, softened, 2 eggs, 2½ teaspoons salt, 7 cups all purpose flour
- Pour in yeast and flour mixture. Knead for 7-10 minutes by hand (or 5-7 minutes in an electric mixer with a dough hook) until dough is elastic and smooth. Transfer dough to an oiled bowl and cover with plastic wrap or dish towel. Let rise for 1 hour or until almost doubled in size.
- Divide the dough into 30 even balls (golf ball sized), usually 58-60 grams each. I cut and roll half, then cut and roll the other half. You can weigh the dough, then divide it by 30 to calculate how much each ball of dough should weigh.
- Roll each dough ball into a smooth ball by cupping the hand in a "C" shape over the roll and moving it around in a small circle on a flat work surface. Pressing your hand gently onto the roll and putting pressure on it will help to keep the top in place while the circular motion drags the edges under, stretching the dough taught to make it smooth and even on top. Practice doing it with both hands!
- Transfer rolls into a greased 11 x 18 inch baking pan with rims, about 6 rows of 5 rolls. Spray with baking spray (so they don't dry out) and cover to rise for about 1 hour until doubled in size (gaps should be filled in), then check them. They may need a little longerto rise if it's cooler. Preheat the oven to 375℉ at the 45-50 minute mark.
- Bake at 375℉ for 15-16 minutes on the middle or bottom shelf. This well help make sure the bottoms are nice and browned.
- After removing the rolls from the oven, melt 3-4 Tablespoons of butter and brush the tops of the rolls while they're still hot. I've also rubbed the butter stick straight onto the hot rolls, use whichever method you like!3-4 Tablespoons melted butter for tops of rolls
Notes
- Follow recipe until Step 6: make dough, let rise ONCE, roll into balls, and freeze dough balls individually.


Justine says
Somehow I’m out of honey. Any recommendations for a substitute here to get the yeast to activate?
Sara says
Yes! They’re all listed in the substitutions section of my post. Hope that helps!
Trish says
This is now my go to roll recipe. I have made it several times and they are always great! Thanks for sharing!
Amber says
Cooked for longer than the time the recipe said at 375 and they were not cooked all the way. The ones on the outside cooked and the middle ones did not.
Sara says
My only advice is to make sure your oven is up to temperature with an oven thermometer 👍🏻 I have been in military housing with an oven up to 50 degrees off before! Even 10 degrees can make a difference in bake time.
Kellie says
Can I store these in the fridge overnight and pull out the next morning to bake? If so, how long do you suggest letting them rise from out of the refrigerator before baking? Can’t wait to taste!
Sara says
Yes! I do them overnight often. The instructions are in the “Make Ahead” section in the blog post after the step by step photos. Happy Baking!
Rangel C Melendez says
Tried this for the first time, tried making rolls for the first time, tried making any type of bread like this and your recipe was right on and the rolls were a hit. Thanks.
Pamela P says
Have you tried this recipe using buttermilk?
Sara says
I haven't but if you try it let me know how it turns out!
Pamela P says
I just finished these up using buttermilk and they are just as fluffy and very delicious. Thank you for the recipe! Happy Thanksgiving all.
Courtney Callahan says
Hey,, I made the bread came out so good!! However, how do I store it cooked rolls for the next day events?
Sara says
Room temperature covered with plastic wrap should be fine!
Ashlee says
Can I make the rolls the night before the event and just bake in the morning? What extra steps would I need to take?
Sara says
Yes! I do them overnight often. The instructions are in the “Make Ahead” section in the blog post after the step by step photos. Happy Baking!
Lindsay says
New baker but I did the make ahead and they were dense and heavy? Not fluffy. What did I do wrong?
Sara says
Sounds like they didn’t rise long enough! If they’ve been refrigerated they take longer than an hour to double in size.
Sara says
Covered with plastic wrap in their pan should be fine!
Natalie says
Used this recipe for the first time making rolls ever and it was AMAZING! USING FOR THANKSGIVING TOMORROW!!
Faith says
Can you confirm how much water I use for my yeast
Sara says
The recipe says 2 cups 👍🏻
Faith says
When freezing I am going to cook them then freeze them any special steps to thaw and warm them back up?
Sara says
I usually thaw them overnight and warm up in a preheated oven (350F) for 5-10 minutes.
Maggie says
So simple, light and fluffy and delish!! I made these for friendsgiving dinner yesterday and they were almost gone (thank goodness not all gone because my family gobbled the rest with breakfast this morning haha). Saving your recipe as a go-to! 🙂
Sara says
So glad you enjoy them as much as we do!! Thanks for coming back to tell me, it always makes my day!
Heather says
Hello Sara,
I am in love with these rolls!!! My confidence after making these has sky rocketed- since I’ve never made rolls successfully before. Could you give me any tips on making these a day ahead without freezing them? I’ll be making the dough the day before thanksgiving and would like freshly baked rolls on the day of
Sara says
So happy to hear it! My advice would be to make the dough and do a first rise, shape the rolls, and then cover and refrigerate the dough balls before they rise again. I usually do this in two 9x13 inch pans or one large 11x18 inch pan if I have enough fridge space. The next day, give them 1-3 hours out of the fridge (still covered) to rise depending on how cold the weather is. Then bake away!
shelly says
If you freeze them before you cook them can I single layer them in a gallon bag together
Sara says
Yes! I usually flash freeze them for at least 30 minutes on a baking tray before I put them in a bag so they don’t stick together.
Sara says
You can freeze them in 1-2 layers in a two gallon bag once cooled. Thaw them at room temperature and reheat in a pan at 350℉ for 10 minutes.
Jessica says
This has been the best recipe. I have made rolls, cinnamon rolls and loaves with it.
Thank you!
Sara says
It does adapt really well. Glad you enjoy it!
Sam says
First time bread baker! I cannot get them to come out like the pictures you’ve posted. But they’re still delicious and fluffy!
Trisha says
I have never been a person who does well with anything needing to rise. I’ve found that these rolls are doable for me. My family really enjoys them. Since they make so many I usually end up inviting some one for dinner. Love this recipe.
Sara says
So happy to hear that! Thank you for coming back to tell me, it always makes my day.
Michael Robbins says
This is the best yeast roll recipe. My grand daughter loves them. She said the ones she gets at school don’t even compare to these. She is now enlightened to what yeast rolls should taste like. She requested I make these for Thanksgiving which I will gladly do.
Jizelle says
Made these tonight. 1/2 d recipe...came out great!!!! Found it to be a little on the heavy side on the inside other than that....perfect!!!! Any suggestions as to why it was heavy on the inside?
Sara says
Glad you enjoyed them!
My guess is a little underbaked or underproved.
Bianca Rodriguez says
Can I use bread flour with this recipe? Or will the measurements need adjusting if I do? Thank you!
Sara says
I have not used bread flour for this recipe, but as far as I know you should be able to use it, the texture and structure of the dough may be slightly different.
Christi says
I only use bread flour with this recipe and it makes the softest fluffiest rolls every time!
Malia says
Not sure where I went wrong… followed the recipe to a T but the cooking time was so off for me. I baked for an additional 4 minutes and all the middle rolls were raw! I’d love to try this recipe again and try it with longer baking time. Otherwise they turned out yummy!
Sara says
Hi Malia! I can think of a few reasons this could have happened.
1. Oven temperature is not accurate - make sure you own an oven thermometer to get accurate temps. It's not always up to temperature when it signals. I once had an oven that was off by 50 degrees!
2. Higher elevation - requires higher oven temps by 15-25 degrees.
3. Rolls are a larger size - if they are 70+ grams each they will need more like 18-20 minutes of baking time.
Hope this helps!
bags says
can I use milk instead of water.
if so. will it change the flavot
Sara says
Yes you can, they just take a little longer to rise in my experience because the fat content is higher than water. But milk tastes amazing in the rolls.